An electrometer is noisy. The noise levels stays over 0.2 fA for 10 second averge records for more than a day.
An electrometer offset current stays above 10 fA for more than a day.
There are intermittent stripes in the measurement spectrograms at certain sizes.
Depending on how dirty the analyser is there are two options for cleaning:
(A) Quick cleaning: The preconditioning unit is removed and the analysers are cleaned in-place using the analyzer cleaning rod.
(B) Thorough cleaning: The preconditioning unit is removed and the analyzers are taken out out the instrument. The outer and inner cylinder are separated and cleaned using a cloth and alcohol.
Both the quick and thorough cleaning procedures require that the preconditioning unit is detached from the instrument first.
Move the instrument where you can access it from all sides.
Remove the top cover and remove the side panels or open the side doors.
For NAIS27: loosen the six bolts for both polarities that fix the charger units to the columns.
Disconnect the DB37 cable from the charger electronics and pull it down through the hole.
Disconnect the DB9 cable from the environmental sensors and pull it down as well.
Disconnect the sheath flow tubes.

Depending on the version of the instrument the unit may be attached slightly differently.

In newer instruments the analyser columns are tighened independently. The top plates of both analysers are separated from the base of the preconditioning unit and tightened with six bolts (marked with C1 - C6 on the figure).
Some instruments have additonal bolts near the cernterline of the base plate for additional stiffness.
(If the C bolts are present) Loosen the bolts marked with C so that the chargers are no longer pressed against the analysers. Don't remove the screws completely.
(if the B bolts are present) Remove the two bolts marked with B
Remove the four nuts marked with A
Find a flat, level and clean ~ 60 x 100 cm desk surface near the instrument.
Lift the preconditioning unit up and place it on the desk.

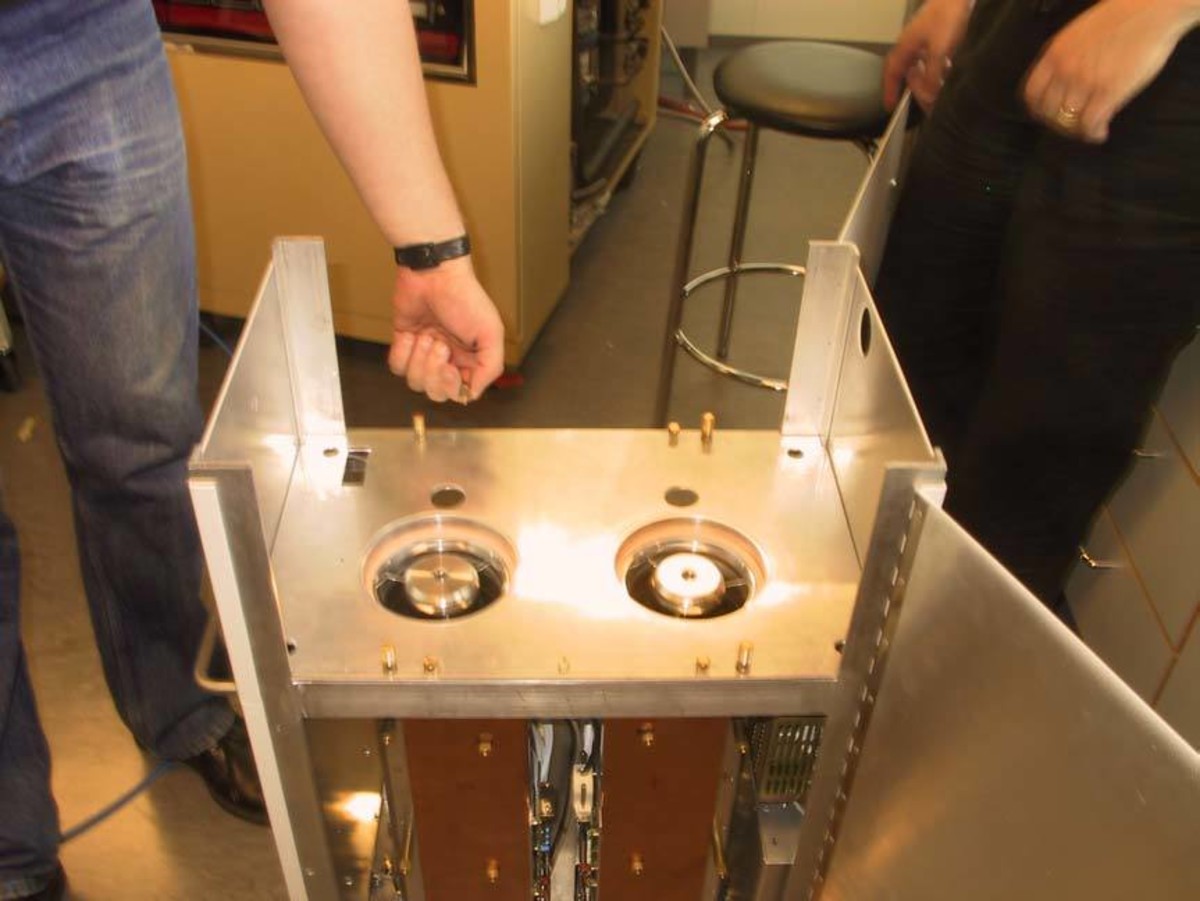
Push the cleaning tool into the slit between central electrode and collecting electrodes. Push until the bottom is reached and then pull the tool out. Clean the tool using a soft material. Repeat the procedure along the whole perimeter of the analyzer.

Remove the four screws that fix the plate below the preconditioning unit and remove the plate. (The plate is not present in NAIS27 and newer instruments)
Disconnect the HV plugs and the airflow tube from the bottom of the analyser.
You may need to disconnect the exhaust flow tubes to access the plugs.

Loosen the three centering screws around the bottom of the analyser.
Detach the electrometer signal plug.

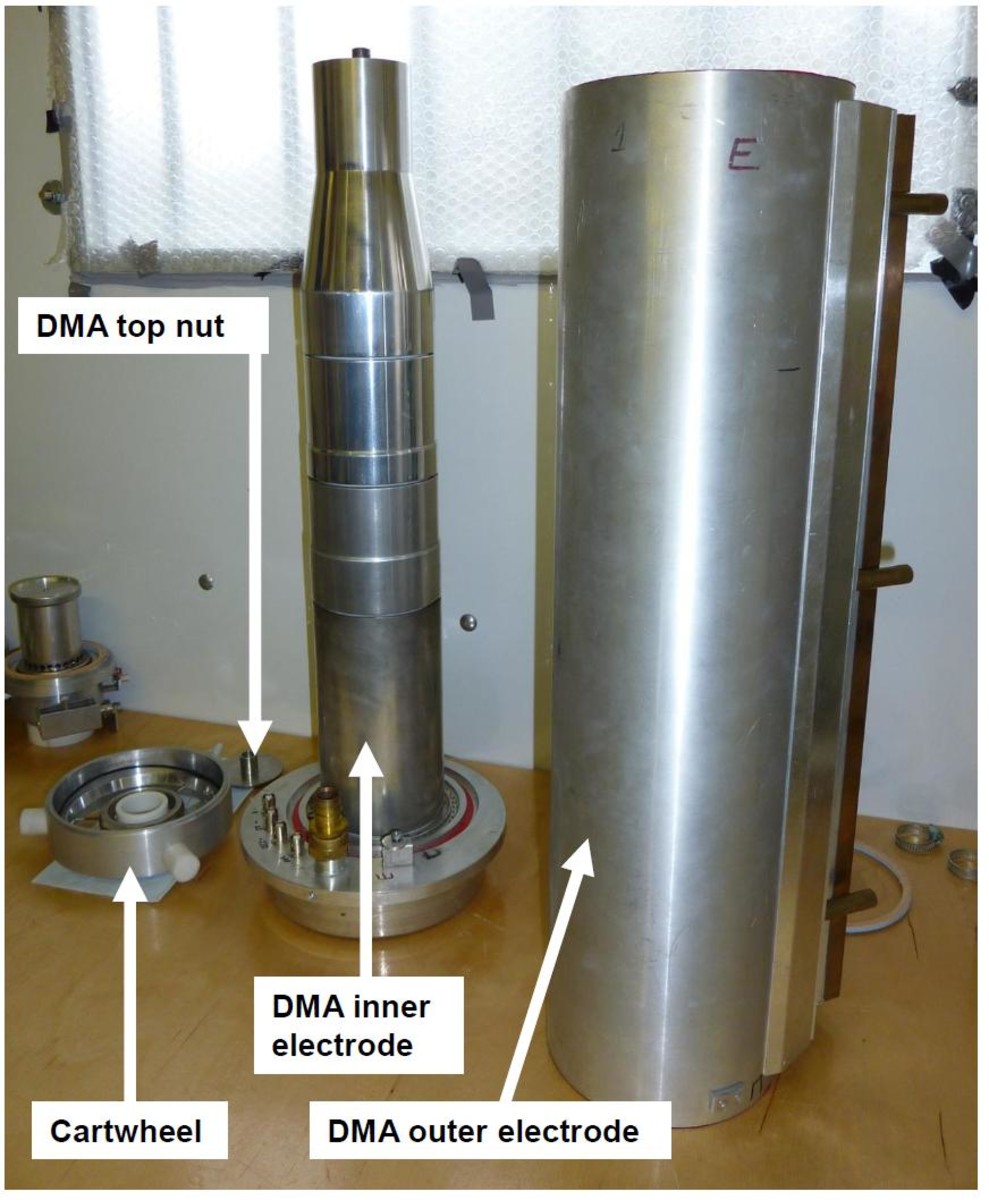
Unscrew the central electrode lid ("DMA top nut").

Detach the centering ring ("Cartwheel").

Remove the analyser from the instrument. First lift it out of the bottom plate and the pull it out lower end first.

Put the analyser upright on a table.
Loosen the two screws at the bottom of the lower plate of the analyser and turn the locks out of the way.

Now the outer electrode is loose. Lift it up while holding the lower plate down. It may be a bit stuck. Try not to hit the central electrode.
Clean the outer and inner electrodes with a soft tissue paper or cloth and alcohol. Prefer materials that do not leave fibres.
Reassemble the analyser following the steps in reverse.
When reattaching the cartwheel centering rings on the analyser make sure that none of the white knobs are left the way of the sheath flow tube later.
When placing the plate on top of the analysers note that the analyser locations should exactly match the holes in the plate. You should not need to push the analysers sideways to make the plate fit, it should fall into place by itself. Use the three centering screws to adjust the analyser position.
For instruments where the analysers can be tightened independently it is very important to reattach the preconditioning unit with the correct procedure.
Make sure that the C bolts are loose.
Tighten the A nuts so that the top plate is firmly against the frame. A gap between the frame and the top plate indicates that the C bolts are not loose.
Tighten the B bolts but pay attention not to bend the top plate noticeably.
Tighen the C bolts gradually and uniformly. Never tighen neighboring bolts consecutively. For example use the order 1-4-2-6-3-5-1-.... Repeat for several rounds and only add half a turn to each bolt at a time.
