Charger cleaning can help with the following problems:
Remove the top cover and open the side doors or remove the side covers of the instrument.
Disconnect the environmental sensor plug and the background filter plug from the inlet tube.
Disconnect the inlet tube from the analyzers.
Remove the three screws from both charger holding rings

Take the charger out.
You may disconnect some coaxial plugs from the charger if the cables are in the way. Note that the plugs and sockets have corresponding numbers.
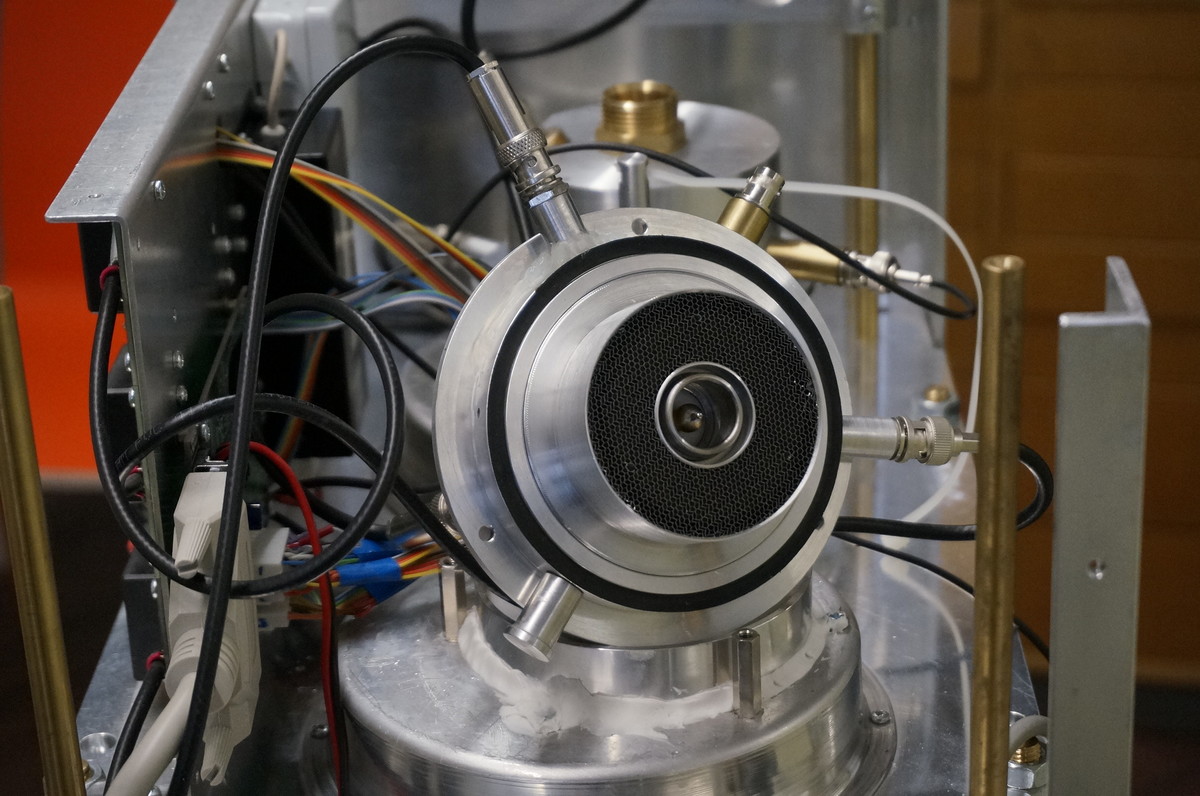
Pull the needle out with pliers or tweezers.
Carefully scrub the needle with tweezers or a sharp knife.

(Thorough cleaning) Unscrew the honeycomb flow straightener.
(Thorough cleaning) Unscrew the filter electrode and clean it with a cloth or paper wipes and alcohol.
Put everything back together in reverse order.
When reattaching the needle, make sure that it remains straight.
Put the charger back and reconnect the plugs.
If you have instrument with the charger holder ring then tighten the ring screws first very lightly and then stronger step by step so that the charger is pressed down evenly from all sides.
Follow the steps in reverse to put everything back together.
