The purpose of the sheath air filter cleaning is to remove the deposited dirt from inside the sheath air filter that is used to clean the recirculated sheath air of the mobility analyzer.
A dirty sheath air may cause invalid signal in the mobility analyzer due to decreased filter effectiveness and in worse case due to corona discharge happening inside the filter.
The sheath filters should be cleaned regularly. A sensible frequency is to clean them is once after every 2-4 analyzer cleaning procedures.
Instruments produced after Nov 2021 will show diagnostic warnings when there are indicators that there may be corona discharge happening inside the sheath air filter and that filter cleaning is required.
Make sure that the device is switched off.
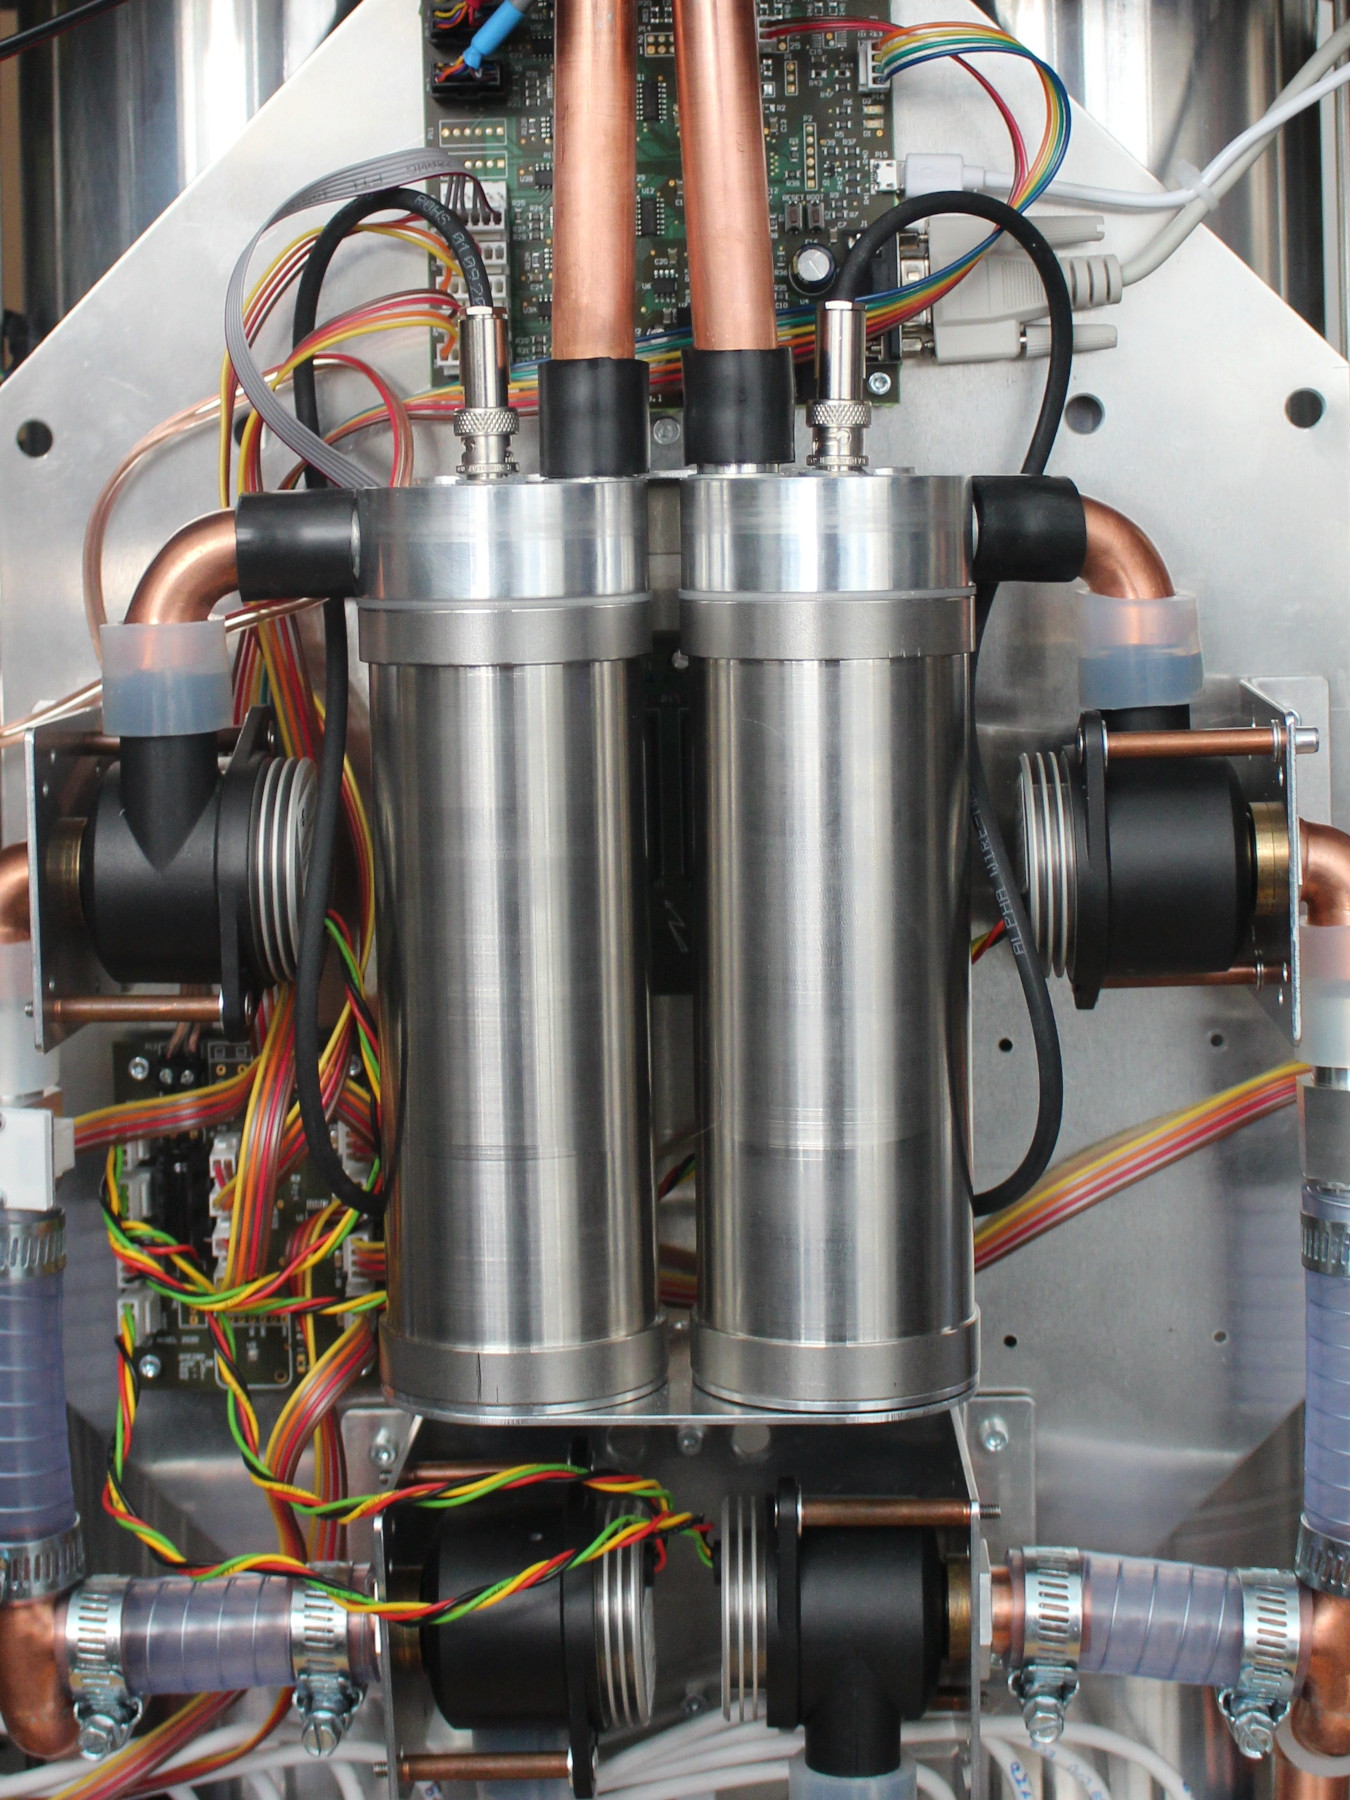
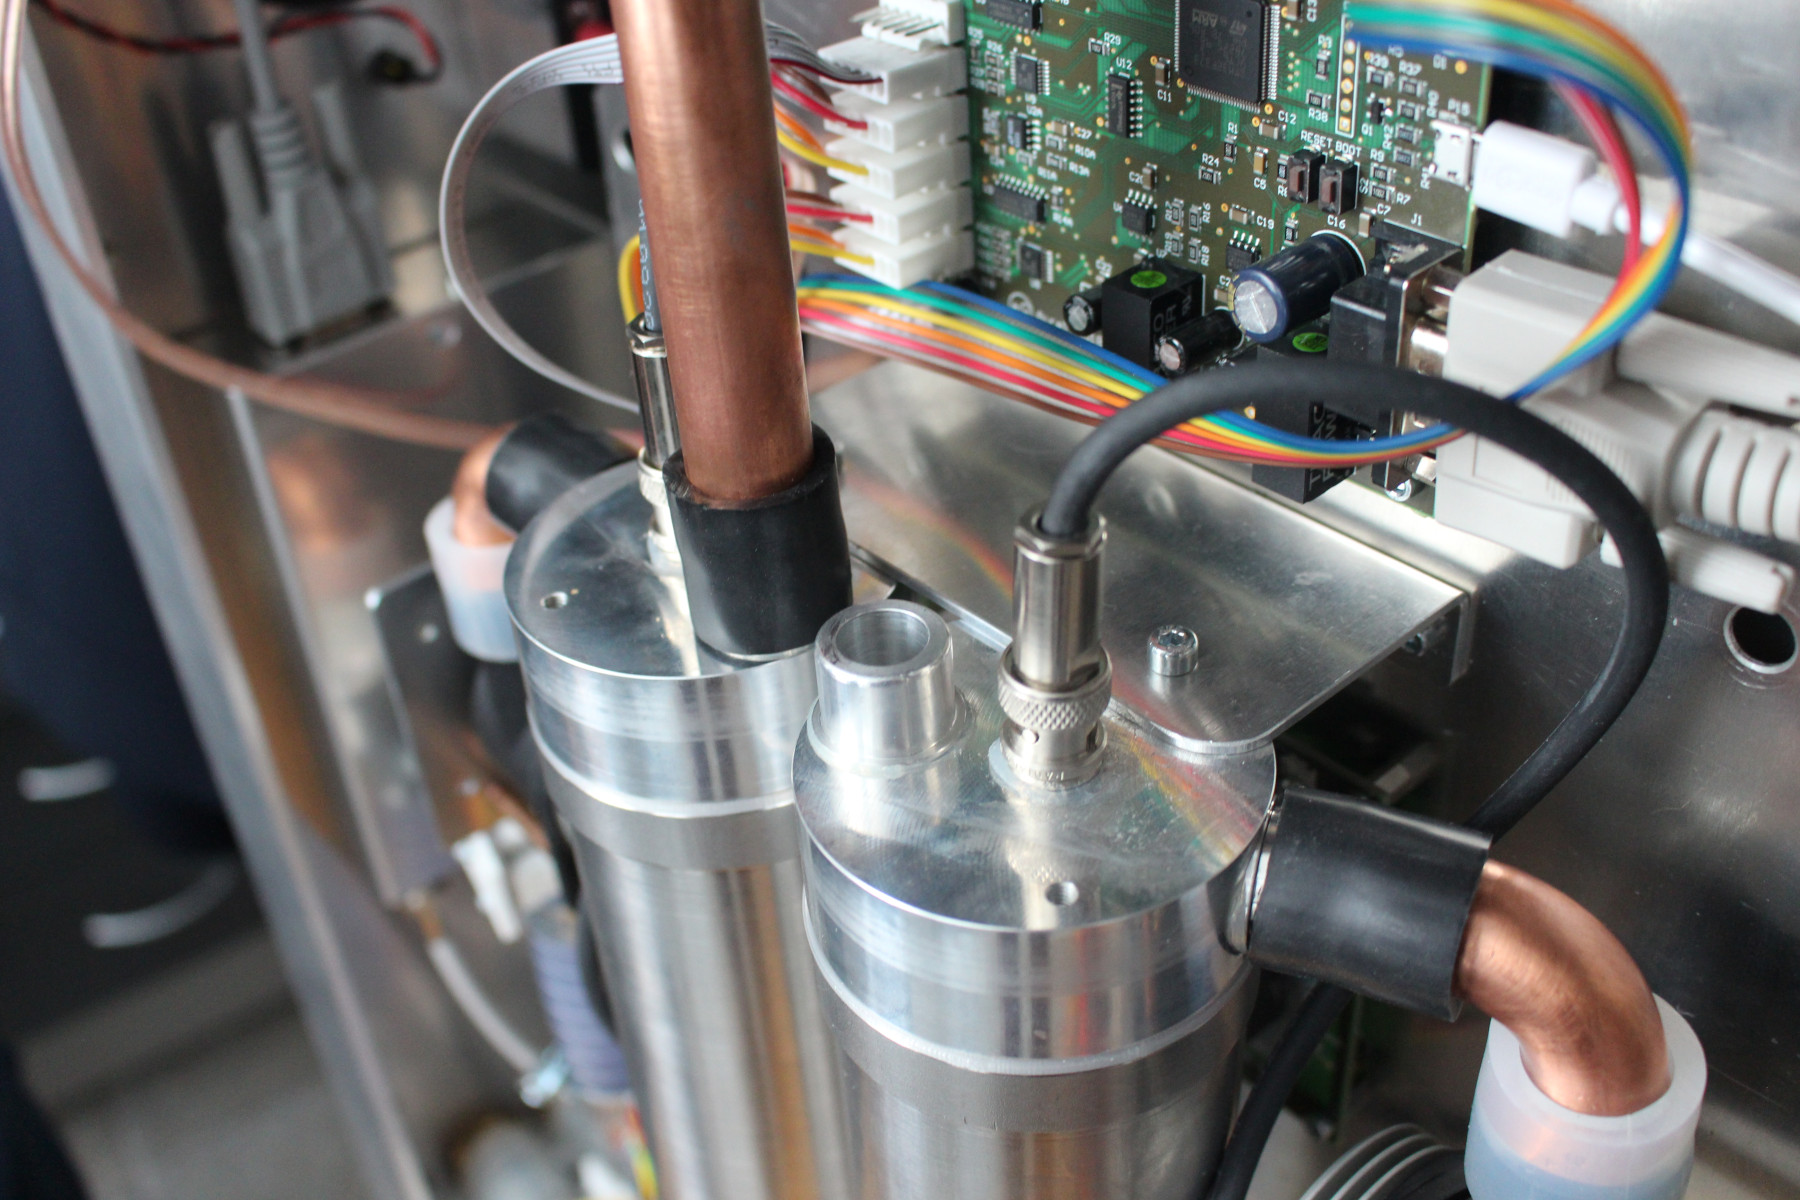
Disconnect and remove the tube going up into the charger filter unit. Disconnect the high voltage plug.
Remove the 3 mm hex bolt from the top of the sheath air filter (behind the high voltage connector).
Remove the nut from the bottom of the sheath air filter.
Take the sheath air filter out of the device.
Unscrew the sheath air filter into two parts.

Do not further disassemble the sheath air filter further.
E.g. removing the outer electrode of the upper part of the sheath air filter is tempting, however when unscrewing it from the white plastic isolator there is danger of breaking the part or damaging internal wiring.
Clean all surfaces of the sheath air filter with disposable wipes and alcohol. A small rod or a brush may can be used to access the deeper end of the inside of the filters.
Avoid leaving paper fibres on the surfaces.
Reassemble everything in reverse order.
Pay attention to the state of the o-ring seal between the upper and lower parts of the sheath air filter. Replace the seal if it is damaged.
